Under-cabinet LED strip lights are the best starting point for most homeowners exploring kitchen cabinet lighting. Specifically, they cost $15 to $50 per linear foot installed. Consequently, they provide excellent value for any remodeling budget. In addition, they cover the most counter area of any lighting type. Furthermore, you can install them without an electrician if you use plug-in versions. First, you must understand the primary types of kitchen cabinet lighting available on the market today. Next, you need to learn how to select the right brightness and color temperature for your specific space. Ultimately, the right lighting transforms a dark, cramped cooking area into a bright, welcoming centerpiece of your home. Therefore, careful planning is essential before you purchase any fixtures. After all, nobody wants to redo electrical work twice.
Under Cabinet LED Strip Lights
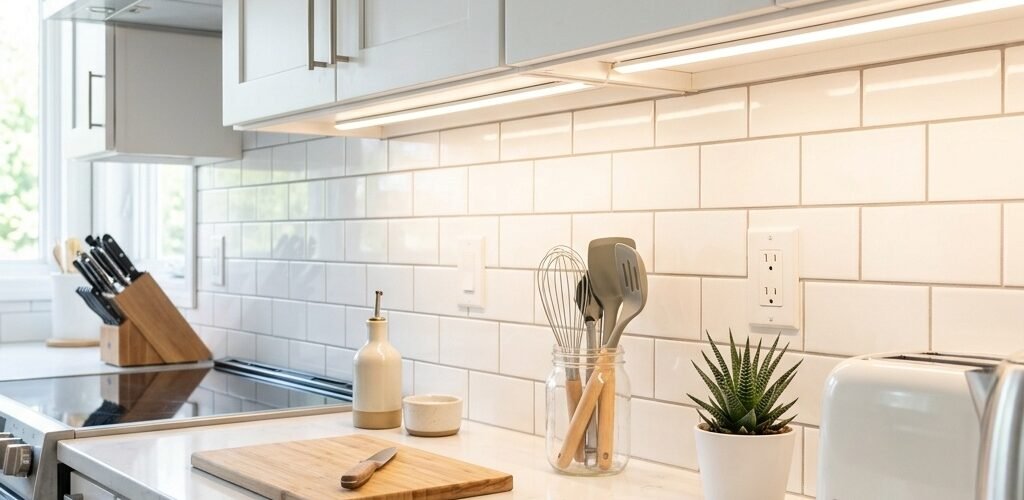
Under cabinet LED strip lights represent the most popular choice for modern kitchen renovations. For example, they offer smooth and incredibly even illumination across all your countertops. Ultimately, you must choose between hardwired and plug-in options when planning your installation. Hardwired lights definitely look cleaner because the power cables hide completely inside the walls. However, plug-in lights are significantly easier to install for the average weekend warrior. In fact, a motivated homeowner can install a complete plug-in system in just a few hours. Meanwhile, hardwired lights almost always require hiring a licensed, professional electrician. Since labor costs can quickly escalate, you must consider your budget carefully. Additionally, LED strips are thin enough to hide completely behind standard cabinet lips. Thus, you get the benefit of bright light without seeing the actual fixture. Specifically, they blend seamlessly into the background.
You absolutely need to pay close attention to the brightness specifications of your LED strips. Specifically, proper task lighting requires a minimum of 300 to 500 lumens per foot. Otherwise, you will simply not have enough light for safely chopping vegetables or reading recipes. Also, the color temperature is a vital consideration for the overall look of your kitchen space. For instance, a color temperature of 2700K to 3000K provides a warm, cozy glow. Consequently, this warmer light suits traditional wood cabinets perfectly. On the other hand, a color temperature of 4000K provides crisp, bright task lighting. Naturally, this cooler light works perfectly in sleek, modern white kitchens. Certainly, you can find many excellent options that fit your specific design requirements. In short, always check current prices on Amazon before finalizing your lighting budget.
Puck Lights
Puck lights provide an entirely different approach to kitchen cabinet lighting design. Specifically, they are round, self contained fixtures that act exactly like miniature spotlights. Naturally, they work best for illuminating display cabinets or open floating shelves. Typically, these light fixtures measure anywhere from 3 to 5 inches in diameter. Because they are spotlights, they create distinct, focused pools of light instead of even, continuous lines. Therefore, they are generally not ideal for primary countertop task lighting where evenness is critical. Still, they create an absolutely beautiful, dramatic visual effect inside glass front cabinets. For example, a single puck light can beautifully highlight a prized collection of crystal glassware. In fact, many high end custom kitchens use puck lights exclusively for decorative accent lighting.
Toe Kick Lighting
Toe kick lighting adds an incredibly luxurious, high end touch to any kitchen design. In fact, it involves installing continuous LED strip lights along the very base of your lower cabinets. As a result, it creates a beautiful, floating ambient floor glow. Specifically, this specialized accent lighting usually costs about $10 to $20 per linear foot. Besides looking absolutely spectacular during parties, it serves as an excellent, functional night light. Obviously, you do not want blinding, harsh light near the floor when getting a midnight snack. Therefore, a warm 2700K color temperature is highly recommended for this specific application. Consequently, the soft glow guides your path safely without disturbing your sleep cycle. Furthermore, it highlights the beauty of your floor materials, whether hardwood or custom tile.
In-Cabinet and Glass Cabinet Lighting
In-cabinet lighting specifically illuminates the interior shelves and display areas of your upper cabinets. Particularly, it is absolutely ideal for glass front cabinets where you proudly display fine china or collectibles. Generally, flexible ribbon LEDs are the absolute best choice for this specific application. Because they are incredibly thin and flexible, you can easily hide them directly behind the cabinet face frame. Thus, the actual light source remains completely invisible to the observer while the dishes glow beautifully. Furthermore, LED lights do not emit harmful UV rays. Therefore, they will not fade the colors of your expensive dishes or artwork over time. In addition, they produce no heat, ensuring your stored items remain safe. Consequently, they are vastly superior to older incandescent display lights.
Comparison Table
| Type | Lumens | Cost | Install Difficulty | Best Use Case | Dimmable? |
| LED Strip | 300 to 500 per foot | $15 to $50 per foot | Medium | Task Lighting | Yes |
| Puck Lights | 150 to 300 per puck | $20 to $40 per puck | Easy | Display Cabinets | Yes |
| Toe Kick | 100 to 200 per foot | $10 to $20 per foot | Medium | Ambient Floor Light | Yes |
How to Install Under Cabinet Lights
First, you must decisively choose between plug-in and hardwired electrical systems for your project. Since hardwired systems require cutting into drywall for wall access, they are best done during a major kitchen remodel. On the other hand, plug-in systems are absolutely perfect for retrofitting existing, finished kitchens. Next, you need to measure the length of all your cabinets very carefully. Consequently, you will know exactly how much lighting material to buy before starting. Afterwards, you will need to cut the LED strips to the precise required sizes. Fortunately, most modern LED strips have designated, clearly marked cut lines every few inches. Therefore, customizing the length is as simple as using a pair of sharp scissors. Still, you must be careful to cut exactly on the designated copper pads.
Connecting the individual segments together is a crucial step in the installation process. Specifically, you can use flexible jumper cables to easily bridge the gaps over sinks, stoves, or windows. Thus, you successfully maintain a single, continuous electrical circuit from a single power source. Finally, proper transformer sizing is absolutely vital for safe and reliable operation. In short, the transformer must confidently provide enough wattage to power all the LEDs in your system. If you mistakenly overload the transformer, the lights will flicker annoyingly or fail completely. For more specific details on cabinet construction that might affect your installation process, read our comprehensive guide on MDF vs plywood cabinets.
What to Look For When Buying
You must carefully evaluate several technical specifications before buying any kitchen cabinet lighting system. First, explicitly check the stated lumens per foot on the packaging. Because you absolutely need bright light for safe food preparation, aim for at least 300 lumens per foot. Second, always verify the Color Rendering Index rating of the LEDs. Specifically, a CRI greater than or equal to 90 ensures accurate, vibrant food colors. Otherwise, your fresh, expensive vegetables might look dull, grey, and unappetizing under cheap lights. Furthermore, high CRI lights make your countertops and backsplashes look significantly more beautiful. Therefore, never compromise on this particular specification when shopping for quality fixtures.
The IP rating is another incredibly important factor to consider for any kitchen lighting project. Since kitchens can frequently be humid areas with boiling water, you want an appropriate IP rating. For example, IP65 offers excellent protection against accidental water splashes and heavy steam. Finally, always look for a high quality dimmable driver unit. Consequently, you can easily lower the brightness after cooking to create a relaxing, comfortable atmosphere. You can explore many professional grade options if you browse options at Home Depot. In addition, pay close attention to the warranty period offered by the manufacturer. Ultimately, a five year warranty indicates a much higher quality product than a standard one year warranty. Thus, spending a little more upfront often saves money long term.
Common Mistakes
Many eager homeowners make the unfortunate mistake of choosing the completely wrong color temperature. For instance, using 6000K daylight bulbs will make your beautiful kitchen look like a sterile, unwelcoming hospital cafeteria. Instead, strongly stick to 2700K or 4000K depending on your cabinet colors. Another very common error is simply not providing enough lumens for the space. As a result, the countertops remain dangerously dark for safe food preparation tasks. Furthermore, installing cheap, low quality non-dimmable drivers is always a huge mistake. Ultimately, dimmable lights offer significantly more flexibility for different times of the day. Because the kitchen serves multiple functions, adjustable lighting is practically mandatory.
Visible glare without a proper diffuser is perhaps the most annoying, amateur mistake possible. Specifically, bare LED diodes reflect incredibly harshly on highly polished granite or quartz countertops. Therefore, you should absolutely always use aluminum channel tracks fitted with frosted plastic covers. In addition to dramatically reducing harsh glare, these channels protect the delicate LEDs from dust and sticky grease. Before starting your entire lighting project, make sure you clearly understand basic kitchen base cabinet dimensions to plan your specific wiring route effectively. Consequently, you can avoid drilling into structural supports or visible finished surfaces. Finally, never cut corners on electrical safety components. Always use properly rated wires and connectors to prevent serious fire hazards.
FAQ
How much does it cost to install kitchen cabinet lighting?
The total cost varies significantly based on the specific system type chosen. For example, simple plug-in LED strips generally cost $50 to $150 in total materials. However, professionally installed hardwired systems can easily cost $500 to $1000 including expensive labor.
Can I install under cabinet lighting myself?
Yes, you can certainly install plug-in style systems yourself without major difficulty. Because they plug directly into existing standard outlets, you do not need special electrical skills or licenses. On the other hand, you absolutely should hire a professional electrician for any hardwired systems.
Which is better for kitchens: warm or cool light?
It depends entirely on your specific kitchen design and color palette. Warm light of 2700K is generally best for traditional, dark wood kitchens. Conversely, cool crisp light of 4000K looks significantly better in sleek, modern white kitchens.